How to set up a professional lighting setup for video
Professional Lighting Setup Video Calls Guide Tip Kit: Master Your On-Camera Presence
A professional lighting setup video calls guide tip kit is essential for anyone conducting business meetings, streaming, or creating content from home. In today’s digital-first world, your on-camera appearance directly impacts how clients, colleagues, and audiences perceive your credibility and professionalism. Poor lighting can make you appear tired, unprofessional, or difficult to see, while proper illumination enhances your features, builds confidence, and ensures clear communication during virtual interactions. This comprehensive guide will walk you through everything you need to know about creating studio-quality lighting in your home office workspace.
Table of Contents
- Why Professional Lighting Setup Video Calls Guide Tip Kit Matters
- Step-by-Step Professional Lighting Setup Video Calls Guide
- Best Professional Lighting Setup Video Calls Guide Tip Kit Options
- Pro Tips for Professional Lighting Setup Video Calls Guide Tip Kit
- Common Mistakes to Avoid
- Key Takeaways
- Frequently Asked Questions About Professional Lighting Setup Video Calls Guide Tip Kit
- Conclusion
Why Professional Lighting Setup Video Calls Guide Tip Kit Matters
Lighting is fundamentally about how your camera perceives your face and surroundings during video calls. When lighting is inadequate, your webcam struggles to capture accurate colors and details, resulting in a dark, grainy, or washed-out appearance. The human eye is remarkably forgiving, but cameras are not—they need sufficient light at the correct angles to render you in the best possible way.
Professional lighting setup video calls guide tip kit significantly impacts your credibility during important business calls. Research shows that poorly lit video participants are perceived as less trustworthy, less competent, and less likable compared to those with proper illumination. For client meetings, job interviews, or presentations, this can mean the difference between closing a deal and losing an opportunity.
Beyond credibility, proper lighting reduces eye strain for both you and your viewers. When your camera doesn’t have adequate light, it increases ISO sensitivity and compression artifacts, which can cause discomfort when watching for extended periods. A well-lit setup makes for a more pleasant viewing experience and demonstrates that you’ve invested effort in professionalism.
Additionally, good lighting setup protects your health and productivity. Harsh overhead lighting or backlighting can cause screen glare, reflections, and eye fatigue throughout your workday. A thoughtfully designed lighting system reduces these issues while creating an aesthetically pleasing workspace that you’ll enjoy spending time in.

Step-by-Step Professional Lighting Setup Video Calls Guide
Step 1: Assess Your Current Lighting Situation
Before purchasing any equipment, evaluate your existing workspace lighting. Position yourself in front of your camera and identify problem areas—harsh shadows under your eyes, uneven skin tone, or reflections on your screen. Take test photos or short videos from different times of day to understand how natural light affects your appearance.
Pay attention to the direction of light sources relative to your position. Light coming from behind you (backlighting) creates silhouettes, while light directly overhead casts unflattering shadows. The ideal scenario is light coming from in front of you at approximately a 45-degree angle. This setup, known as the three-point lighting technique, forms the foundation of professional video production.
Step 2: Position Your Key Light
Your key light is the primary light source that illuminates your face. Position it to the side of your camera at about 45 degrees horizontally and 45 degrees vertically from your face. This angle creates dimension and reduces harsh shadows while maintaining a natural appearance. The key light should be bright enough to see detail in your eyes and skin tone clearly.
For most home office setups, a softbox or diffused LED panel works excellently as a key light. These distribute light evenly and reduce the harsh shadows created by direct, undiffused sources. Aim for a light that provides 500-1000 lumens of brightness, though this varies based on your room size and ambient lighting conditions.
Step 3: Add a Fill Light
A fill light softens shadows created by your key light, resulting in more flattering illumination. Position your fill light on the opposite side of your key light at a lower intensity—typically 25-50% of your key light’s brightness. This creates a more three-dimensional appearance without introducing competing shadows. Many professionals use a simple white reflector instead of a dedicated light, which is budget-friendly and effective.
If using a dedicated fill light, place it slightly lower than your key light to lift shadows under your chin and eyes. The fill light should never be brighter than your key light, as this inverts the natural lighting hierarchy and looks unnatural. Test different positions and intensities until you find a balance that flatters your features while maintaining dimension.
Step 4: Implement Backlighting
Backlighting, also called a rim light, illuminates the back of your head and shoulders to separate you from your background. This creates depth and makes your image appear more three-dimensional and professional. Position a smaller light source behind you, pointed toward the back of your head at a slight angle. Keep it dimmer than your key light—typically 25-50% of its intensity.
Backlighting is optional for basic video calls but highly recommended if you’re streaming, doing content creation, or conducting important presentations. It transforms an ordinary home office background into a polished, studio-quality setup. Be careful to avoid aiming the backlight directly at your camera, as this creates lens flare and glare.
Step 5: Control Your Color Temperature
Color temperature, measured in Kelvin (K), determines whether light appears warm (yellow-orange) or cool (blue-white). Most video conferencing software and cameras perform best with consistent color temperature across all light sources. Mixing warm and cool lights creates color casts that look unprofessional and are difficult to correct in post-production.
For video calls, aim for a color temperature between 3200K (warm white) and 5600K (daylight). Many professionals prefer 4000-5000K as it appears natural without looking either too warm or too clinical. Ensure all your lights operate at the same color temperature by choosing lights with matching specifications or adjustable color temperature features.
Step 6: Optimize Camera Angle and Distance
Position your camera at eye level or slightly above to create a flattering perspective. When your camera is too low, it emphasizes your double chin and creates unflattering upward angles. When it’s too high, it can make you appear small or insignificant. Eye level placement creates a sense of equality and direct engagement with your video call participants.
The distance between you and your camera should be approximately 12-24 inches (30-60 cm) for most video conferencing. This distance captures your head and shoulders while maintaining a natural frame. Ensure your lighting setup accounts for this distance—lights that work well at 3 feet may be too intense or too dim at other distances.

Best Professional Lighting Setup Video Calls Guide Tip Kit Options
Budget-Friendly Option: Natural Light + Reflector
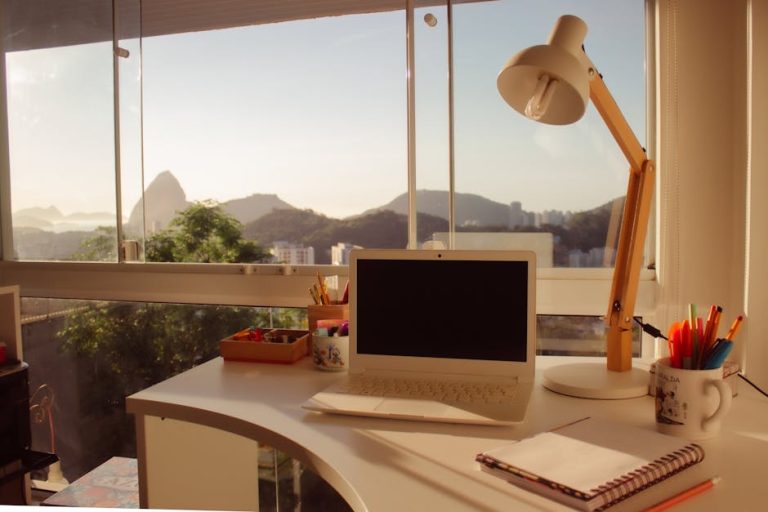
If you’re just starting out, the most cost-effective approach uses natural light combined with a simple white reflector. Position your desk near a window with diffuse, indirect light (avoid harsh direct sunlight). Place a white foam board or fabric reflector opposite the window to bounce light back onto your face and fill shadows. This setup costs under $30 and works surprisingly well for casual video calls.
The main limitation is that natural light varies throughout the day and depends on weather conditions. For consistent, professional results during important calls, you’ll eventually want dedicated lighting. However, this approach is excellent for testing and learning fundamental lighting principles before investing in equipment.
Mid-Range Option: Two-Light Setup
A professional lighting setup video calls guide tip kit at the mid-range price point includes a quality key light and a fill light. Invest in adjustable LED panels that offer color temperature control and dimming capabilities. Popular options include the Neewer RGB LED panels or similar brands offering 20-40W continuous lights. Total investment typically runs $150-300 for quality equipment that will last years.
This setup provides excellent results for most business video calls and content creation. LED lights generate minimal heat, consume little electricity, and offer precise control over brightness and color. Many mid-range options include wireless remote controls for easy adjustment during calls. This tier represents an excellent balance between affordability and professional results.
Premium Option: Three-Light Professional Setup
Professional creators and business executives often invest in complete three-light setups featuring a key light, fill light, and backlight. Premium options include systems from brands like Elgato, Neewer Pro, and ARRI, ranging from $400-2000+. These setups offer superior build quality, wireless control, color accuracy, and advanced features like scheduling and scene presets.
Premium lighting systems often include professional softboxes, stands, light modifiers, and control apps. They provide the most flattering results and allow for extensive customization based on your specific needs and preferences. For anyone conducting frequent high-stakes video calls or creating professional content, the investment pays dividends in terms of results and longevity.
Ring Light Option: All-in-One Solution
Ring lights have become increasingly popular for video calls and content creation. These circular lights surround your camera lens, providing even, shadow-free illumination that’s flattering for close-up shots. Ring lights are versatile, easy to use, and typically cost $50-200 depending on size and features. They work exceptionally well for testimonials, social media content, and one-on-one video calls.
The main limitation of ring lights is that they can create distinctive ring-shaped catchlights in your eyes, which some people find distracting. They’re also less flexible for complex lighting setups requiring multiple light sources at different angles. However, for streamlined, simple video conferencing, a quality ring light represents an excellent all-in-one solution.

Pro Tips for Professional Lighting Setup Video Calls Guide Tip Kit
Invest in Light Modifiers
Light modifiers like softboxes, diffusion panels, and umbrellas dramatically improve lighting quality. These tools spread light across a larger area and soften harsh shadows, creating more flattering illumination. A simple diffusion panel ($20-40) attached to any light source transforms its quality. For the most professional results, invest in softboxes sized 24×24 inches or larger, which distribute light beautifully and reduce harsh shadows.
Use Dimmers and Brightness Control
Not every lighting situation requires maximum brightness. Dimmers and remote-controlled brightness adjustment allow you to fine-tune illumination for different scenarios. Some video calls might need brighter lighting for clarity, while others benefit from slightly dimmer, more intimate settings. Look for lights with wireless dimming capability or affordable wireless remote controls that let you adjust brightness without leaving your seat.
Create Lighting Profiles for Different Scenarios
Develop specific lighting profiles optimized for different activities—formal business calls, creative sessions, client presentations, and casual meetings. Document your light positions, brightness levels, and color temperatures for each scenario using photos or a simple notebook. This consistency reduces setup time and ensures you always appear professional, regardless of the meeting type.
Monitor Your Lighting During Calls
Enable your own video preview during calls to monitor how you appear in real-time. Most video conferencing software shows a small preview window—watch this carefully during important calls and adjust lights if needed. You’ll quickly learn how brightness, angle, and color temperature adjustments affect your appearance, allowing you to make real-time improvements.
Layer Your Lighting
Avoid relying on a single light source. Combine dedicated video lights with ambient room lighting for a more complete, natural appearance. Soft background ambient lighting adds depth and professionalism without creating harsh shadows or appearing washed out. Dimmed overhead lights or wall sconces work well for this purpose, complementing your key and fill lights.
Common Mistakes to Avoid
Positioning Lights Directly Behind You
The most common lighting mistake is placing all light sources behind you, which backlit your face and creates a silhouette. This happens when people rely solely on ambient room lighting positioned above and behind them. Always ensure your primary light source is in front of you at an angle. If you have existing overhead lights, supplement them with forward-facing lights to properly illuminate your face.
Using Only Overhead Lighting
Overhead lighting, while common, creates unflattering downward shadows under your eyes and nose. This makes you appear tired and emphasizes under-eye bags or blemishes. Never rely solely on ceiling lights for video calls. Always add at least one forward-facing light positioned at roughly eye level or slightly higher to combat these harsh shadows.
Inconsistent Color Temperature
Mixing warm and cool lights creates a distracting color cast that looks unprofessional and is difficult for viewers to watch. Before purchasing lighting equipment, verify that all lights match in color temperature. If you must use mixed color temperatures, aim for middle-ground 4000-5000K settings across all sources. Consistency matters more than specific color temperature choice.
Placing Lights Too Close
Positioning lights too close to your face causes overexposure, blown-out highlights, and unflattering harsh shadows. Generally, keep key lights at least 3-4 feet away from your face. If your space is limited, use lower-power lights rather than high-power lights positioned very closely. Test different distances to find the sweet spot where your face is evenly illuminated without appearing overexposed or harshly shadowed.
Ignoring Camera Settings and Exposure
Even perfect lighting won’t help if your camera’s exposure settings are incorrect. Learn your camera’s manual exposure controls and white balance settings. Most webcams have automatic settings that attempt to compensate for poor lighting, which can actually make proper lighting less effective. Experiment with manual settings to see which combination works best with your lighting setup.

Key Takeaways
- Position your key light at 45-degree angles horizontally and vertically from your face for dimension and natural-looking illumination
- Add a fill light on the opposite side at 25-50% brightness to soften shadows and create flattering facial lighting
- Maintain consistent color temperature across all light sources (ideally 4000-5000K) for professional appearance
- Avoid relying solely on overhead or backlighting which creates unflattering shadows and silhouettes
- Invest in quality light modifiers like softboxes and diffusers to transform light quality and reduce harsh shadows
Frequently Asked Questions About Professional Lighting Setup Video Calls Guide Tip Kit
Q: What is the best professional lighting setup video calls guide tip kit?
A: The best professional lighting setup video calls guide tip kit depends on your budget and needs. For most people, a two-light setup with a main key light and fill light at $150-300 provides excellent results. Professional-grade three-light systems offer superior results but cost more. Ring lights work well for casual calls, while traditional setups offer more flexibility for diverse scenarios. Choose based on your specific requirements and budget constraints.
Q: How do I use professional lighting setup video calls guide tip kit?
A: Position your key light at 45 degrees to the front and side of your face, add a fill light on the opposite side at lower intensity, and optionally add backlighting behind you. Adjust brightness and color temperature until your face appears evenly illuminated without harsh shadows. Test your setup using your camera’s preview function before important calls. Enable your video preview during calls to monitor appearance and make real-time adjustments as needed.
Q: What color temperature should I use for video calls?
A: For video conferencing, use color temperature between 4000-5000K (daylight white). This appears natural without looking too warm (yellow) or too clinical (blue). Ensure all your lights match in color temperature for consistent results. Adjustable lights allow you to fine-tune color temperature based on your specific workspace and preferences throughout the day.
Q: Can I use natural light for professional video calls?
A: Natural light can work well if positioned correctly—position yourself with a window to your side or front, never with a window directly behind you. Avoid harsh direct sunlight which creates unflattering shadows. Diffuse bright light using sheer curtains or white fabric. For consistent, professional results during important calls, supplement natural light with dedicated lighting to compensate for time-of-day and weather variations.
Q: How much does a professional lighting setup cost?
A: Basic professional lighting setups start around $80-150 for single-light solutions like quality ring lights or basic LED panels. Mid-range two-light setups cost $150-400. Professional three-light systems range from $400-2000+. You can start affordably with natural light and reflectors ($20-30), then upgrade as needs and budget allow. The best approach is investing gradually in quality equipment you’ll use regularly.
Conclusion
Mastering your professional lighting setup video calls guide tip kit is one of the highest-impact investments you can make in your home office workspace. Proper lighting directly influences how you’re perceived during video calls, your confidence on camera, and the professionalism of your content. By implementing the three-point lighting technique with a key light, fill light, and optional backlight, you’ll transform your appearance from ordinary to studio-quality. Start with a simple two-light setup if budget is a concern, knowing that even modest investments in proper illumination yield dramatic improvements. Whether you’re conducting client calls, streaming, or creating content, take action today to implement the professional lighting setup video calls guide tip kit recommendations outlined in this guide.
Recommended Products on Amazon
As an Amazon Associate I earn from qualifying purchases.