How to clean a keyboard properly without damage
How to Clean Keyboard Properly Without Damage: 7 Essential Tips Key Remove Guide
Introduction
Learning how to clean keyboard properly without damage tip key remove is essential for maintaining both the performance and longevity of your workspace setup. Whether you work from home, in an office, or use your computer for gaming, your keyboard accumulates dust, debris, and bacteria on a daily basis that can affect its functionality and lifespan. Most people underestimate the importance of proper keyboard maintenance, often resorting to harsh cleaning methods that can cause permanent damage to sensitive electronic components. This comprehensive guide will walk you through proven techniques for maintaining your keyboard’s pristine condition while ensuring all your keys remain responsive and functional for years to come. By implementing these professional-grade cleaning strategies, you’ll extend your keyboard’s life and create a more hygienic workspace.
Table of Contents
- Introduction
- Why Clean Keyboard Properly Without Damage Tip Key Remove Matters
- Step-by-Step Clean Keyboard Properly Without Damage Tip Key Remove Guide
- Best Clean Keyboard Properly Without Damage Tip Key Remove Options
- Pro Tips for Clean Keyboard Properly Without Damage Tip Key Remove
- Common Mistakes to Avoid
- Key Takeaways
- Frequently Asked Questions About Clean Keyboard Properly Without Damage Tip Key Remove
- Conclusion
Why Clean Keyboard Properly Without Damage Tip Key Remove Matters
Your keyboard is one of the most frequently touched surfaces in your entire workspace, making it a breeding ground for bacteria, dust, and grime. Studies show that the average keyboard harbors more bacteria than a toilet seat, which makes regular cleaning not just beneficial but necessary for your health and hygiene. Beyond health concerns, accumulated debris beneath your keys can cause mechanical failures, unresponsive keys, and reduced typing accuracy that frustrates your productivity.
Understanding how to clean keyboard properly without damage tip key remove is crucial because keyboards are delicate electronic devices with precision components that can be easily damaged by improper cleaning techniques. Using excessive water, harsh chemicals, or aggressive scrubbing can destroy the circuit boards, damage key switches, and corrode electrical connections irreparably. When you invest in a quality mechanical keyboard or wireless device, proper maintenance becomes even more important since these premium products deserve careful handling.
Dust accumulation doesn’t just affect hygiene—it directly impacts your keyboard’s performance and lifespan. Particles settle between keys and underneath the keycaps, creating resistance in mechanical switches and potentially causing keys to stick or fail to register properly. Regular, proper cleaning prevents this degradation and keeps your keyboard functioning at peak performance levels. Beyond functionality, a clean keyboard simply looks better in your workspace, creating a more professional and pleasant environment where you actually enjoy working.
Step-by-Step Clean Keyboard Properly Without Damage Tip Key Remove Guide
Preparation Phase
Before you begin any cleaning process, turn off your computer and disconnect your keyboard completely to prevent accidental input or electrical damage. Allow your keyboard to sit for five to ten minutes to ensure all electrical charges have dissipated completely. Gather all your cleaning supplies in one location so you’re not scrambling for materials while your keyboard sits vulnerable on your desk.
Step 1: Remove Loose Debris
Start by holding your keyboard upside down at a 75-degree angle over a trash can and gently tapping the back and sides to dislodge loose dust and crumbs. Use a small brush or old toothbrush with soft bristles to gently sweep between the keys, working from left to right systematically. This initial step removes approximately 80% of loose debris without requiring any liquid or intensive scrubbing, making it the safest first step.
Step 2: Use Compressed Air Effectively
Invest in a quality can of compressed air and hold it upright while spraying short bursts between the keys at a 45-degree angle. Never shake the can or hold it upside down, as this can dispense liquid propellant that damages components. Work methodically across your entire keyboard, paying special attention to the spaces where your fingers naturally rest during typing, as these areas accumulate the most debris.
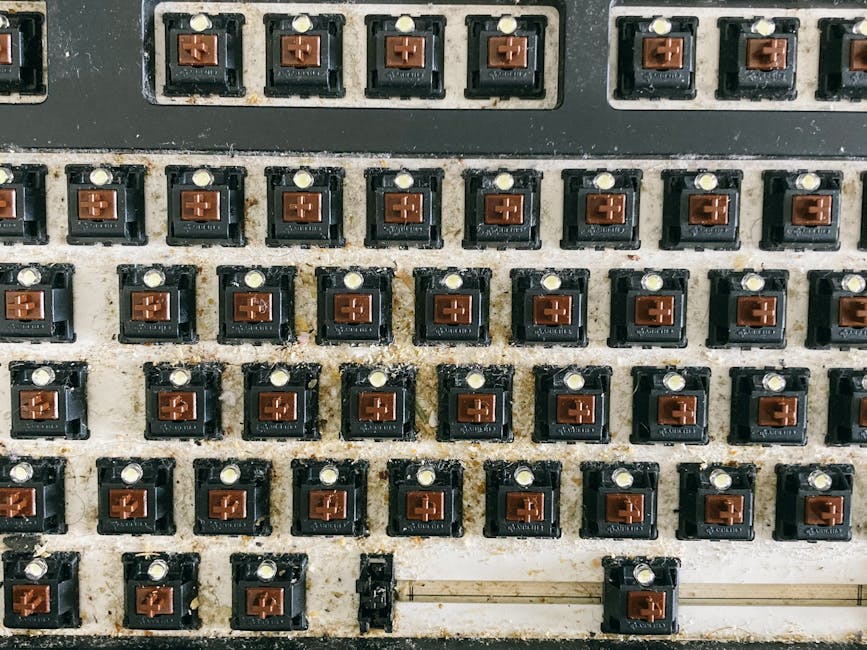
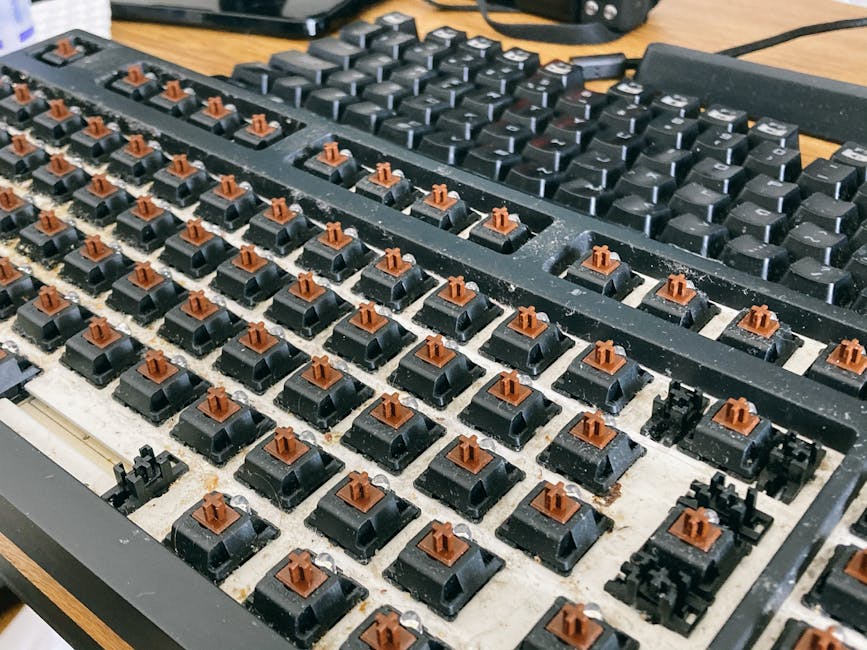
Step 3: Clean Individual Keys (Optional Removal)
For mechanical keyboards or high-end models, you can carefully remove individual keycaps by gently pulling them straight up with a slight rocking motion. Place them in a container and gently wipe each keycap with a barely damp microfiber cloth—not dripping wet, just slightly moistened. If your keyboard uses scissor switches or is a laptop keyboard, skip this step entirely as removing keys can cause damage you cannot easily repair.
Step 4: Address the Keyboard Surface
Use a barely damp microfiber cloth to gently wipe the entire surface of your keyboard, including areas between the keys where you can safely reach. For stubborn stains or sticky spots, lightly dampen the cloth with a 50/50 mixture of distilled water and isopropyl alcohol, never applying liquid directly to the keyboard. Work in small circular motions and avoid pressing too hard, as excessive pressure can force moisture into the device.
Step 5: Clean the Underside
Turn your keyboard over and use a soft brush to gently clean the bottom surface and any vents or openings where dust accumulates. This step is often overlooked but crucial for keyboards with feet and air circulation needs. A clean underside ensures better airflow and removes dust that could eventually make its way to internal components.
Step 6: Final Inspection and Drying
Allow your keyboard to air dry completely for at least 30 minutes before reconnecting it to your computer—patience here prevents potential electrical issues. Inspect each key to ensure they move freely and aren’t stuck or sluggish after cleaning. If you notice any keys not responding properly, disconnect again and recheck those specific areas for remaining moisture or debris.
Step 7: Reassembly and Testing
If you removed keycaps, carefully replace each one by pressing straight down until you hear a soft click indicating proper seating. Power on your computer and test every key to confirm everything responds correctly and your typing feels normal. Open a text editor and type a variety of letters, numbers, and symbols to verify complete functionality before resuming your normal work.

Best Clean Keyboard Properly Without Damage Tip Key Remove Options
Compressed Air Systems
Compressed air remains the gold standard for keyboard cleaning because it removes debris without introducing moisture or chemicals that could damage components. Quality compressed air cans deliver consistent pressure and include thin straws for precise application between keys. For frequent cleaners, consider investing in an electric air duster that doesn’t require constant can replacements and provides more environmentally friendly operation.
Microfiber Cloths and Cleaning Solutions
A pack of quality microfiber cloths should be your keyboard cleaning staple, as they trap dust and grime without scratching surfaces or leaving lint residue. Pair cloths with a gentle cleaning solution specifically formulated for electronics—never use general-purpose cleaners or window solutions that contain ammonia. Isopropyl alcohol at 70% concentration works excellently for disinfection without damaging most keyboard materials.
Keyboard Cleaning Kits
Comprehensive cleaning kits combine multiple tools including brushes, cloths, compressed air, and gentle solutions in one convenient package designed specifically for keyboard care. These kits take the guesswork out of selecting compatible products and often provide better value than purchasing items separately. Look for kits that include both wet and dry cleaning options for maximum versatility across different keyboard types.
Specialized Keyboard Cleaning Gels
Gel-based keyboard cleaners work by physically adhering to dust and debris when pressed into tight spaces, then peeling away to remove accumulated grime without moisture exposure. These products are particularly effective for removing stubborn debris between keys that compressed air cannot dislodge. Apply the gel gently, press it between keys, and allow it to dry before peeling away—this method provides impressive results with minimal risk.
Natural Cleaning Alternatives
For environmentally conscious cleaners, a simple mixture of distilled water and white vinegar (1:1 ratio) provides effective disinfection without harsh chemicals or toxic fumes. This natural solution costs pennies to make and works remarkably well on most keyboard materials, though you should still apply it sparingly with a cloth rather than spraying directly. Baking soda mixed with a small amount of water creates a gentle paste suitable for removing stubborn stains without abrasion.

Pro Tips for Clean Keyboard Properly Without Damage Tip Key Remove
Establish a Regular Cleaning Schedule
Implement a weekly dusting routine with compressed air to prevent heavy buildup that requires more intensive cleaning methods and poses higher damage risks. Deep cleaning once monthly with moistened cloths keeps your keyboard thoroughly sanitized while minimizing the frequency of moisture exposure. Seasonal deep cleaning with complete disassembly (if your keyboard design allows) refreshes your device while keeping components in optimal condition.
Create a Dust-Free Workspace
Minimize keyboard contamination by keeping your workspace clean and organized, storing food and beverages away from your desk, and using keyboard covers during periods of non-use. Consider installing a small air purifier near your workspace to reduce airborne particles that settle on your keyboard throughout the day. These preventative measures reduce your cleaning workload significantly and extend the intervals between intensive cleaning sessions.
Know Your Keyboard Type
Mechanical keyboards with removable keycaps tolerate more intensive cleaning and benefit from periodic disassembly for thorough component cleaning. Membrane and scissor-switch keyboards require gentler handling, as the delicate switch mechanisms can be damaged by aggressive key removal or excessive moisture exposure. Laptop keyboards are the most fragile and should limit cleaning to compressed air and gentle surface wiping only.
Test First in Hidden Areas
Before applying any liquid solution to your entire keyboard, test it on an inconspicuous area or a key you don’t use frequently to ensure it won’t cause discoloration or damage. This simple precaution prevents costly mistakes and allows you to verify compatibility before committing to a full cleaning session. Allow adequate time for the test area to dry completely before assessing whether the cleaning method is suitable for your specific keyboard material.
Invest in Keyboard Covers and Accessories
Transparent keyboard covers or specialized skins reduce dust accumulation between cleanings while maintaining full keyboard functionality and aesthetics. Cable management systems keep debris from accumulating around your keyboard’s connection points and charging ports. These protective investments cost very little compared to replacing a keyboard damaged by inadequate cleaning or environmental exposure.

Common Mistakes to Avoid
Applying Liquid Directly to Your Keyboard
The most dangerous mistake people make is spraying or pouring cleaning solutions directly onto their keyboard, risking liquid seepage into sensitive electronic components. Always apply liquid to your cleaning cloth first, then use the cloth to wipe the keyboard—this simple step prevents catastrophic damage and extends your device’s life indefinitely.
Using Excessive Moisture
Even when applying liquid to your cloth, using too much moisture introduces too much water into your keyboard’s mechanical systems and electrical components. Your cloth should be barely damp—if you can squeeze any liquid from it, you’ve used too much and should wring it out more thoroughly.
Harsh Chemicals and Abrasive Materials
Acetone, bleach, and window cleaners contain chemicals that dissolve plastic, corrode metal components, and damage circuit boards permanently. Avoid scouring pads, steel wool, or rough-textured cloths that scratch keyboard surfaces and remove protective coatings. Stick with soft cloths, gentle solutions, and non-abrasive tools specifically designed for delicate electronics.
Removing Keys Inappropriately
Yanking keys sideways or applying excessive force during removal can break stabilizers, stems, and connectors that cannot be easily replaced on many keyboard models. Always remove keys with a straight upward motion using gentle, steady pressure rather than aggressive pulling or twisting movements. When in doubt about whether your keyboard design allows safe key removal, skip this step and limit cleaning to the keyboard’s exterior surfaces.
Cleaning While Powered On
Attempting to clean a connected or powered keyboard creates electrical shock risk and can cause unintended inputs that corrupt files or execute dangerous commands. Always disconnect completely and wait several minutes for all electrical charge to dissipate before beginning any cleaning procedure. This simple precaution protects both your keyboard and your computer from preventable damage.
Ignoring Drying Time
Rushing the drying process by reconnecting your keyboard before moisture has evaporated completely invites short circuits and electrical failures that destroy components. Set a minimum 30-minute drying window and verify dryness by inspecting the keyboard in good lighting before reconnection. This patience prevents expensive repairs or complete keyboard replacement.
Key Takeaways
- Master the Basics: Start with compressed air and soft brushes before introducing any moisture to safely remove 80% of keyboard debris
- Disconnect Always: Turn off and disconnect your keyboard completely before cleaning to prevent electrical damage and accidental input
- Moisture Management: Apply cleaning solutions to cloths rather than directly to your keyboard, and use barely damp materials only
- Know Your Keyboard: Mechanical keyboards tolerate more intensive cleaning, while laptop and membrane keyboards require gentler, more conservative approaches
- Establish Routine: Implement weekly dusting and monthly deeper cleaning to prevent heavy accumulation requiring risky intensive methods
Frequently Asked Questions About Clean Keyboard Properly Without Damage Tip Key Remove
Q: What is the best method for clean keyboard properly without damage tip key remove?
A: The safest method combines compressed air for loose debris removal, soft brush techniques for general cleaning, and barely damp microfiber cloths for surface wiping. This three-stage approach removes virtually all contamination while minimizing moisture exposure and mechanical stress on components. For mechanical keyboards, optional keycap removal and individual cleaning can provide deeper results, but this should only be attempted if your keyboard design clearly supports this operation.
Q: How frequently should I perform clean keyboard properly without damage tip key remove?
A: A quick weekly dusting with compressed air prevents heavy buildup, while monthly deeper cleaning with moistened cloths maintains optimal hygiene and performance. If you eat at your desk, work in dusty environments, or have pets, increase frequency to weekly deep cleaning. Seasonal intensive cleaning with complete disassembly refreshes your keyboard thoroughly while extending its functional lifespan significantly.
Q: Can I use regular household cleaners for clean keyboard properly without damage tip key remove?
A: Absolutely not—household cleaners like bleach, ammonia-based window cleaners, and harsh degreasers destroy plastic, corrode metals, and damage electronic components irreparably. Stick exclusively with solutions formulated for electronics, such as 70% isopropyl alcohol, distilled water mixtures, or commercial keyboard cleaning products. When in doubt, compressed air and mechanical methods are always safer than chemical solutions.
Q: What’s the difference between mechanical and membrane keyboards regarding clean keyboard properly without damage tip key remove?
A: Mechanical keyboards feature removable keycaps and robust switch mechanisms that tolerate disassembly and intensive cleaning without damage. Membrane keyboards use delicate scissor switches and typically non-removable keys that require gentler, surface-only cleaning approaches. Laptop keyboards are the most fragile and should only receive compressed air and gentle surface wiping to prevent damage to integrated components.
Q: How long should I wait after cleaning before using my keyboard?
A: Allow a minimum of 30 minutes for complete air drying before reconnecting and using your keyboard to prevent electrical short circuits. For keyboards that received more extensive moisture exposure, waiting a full hour provides extra assurance that all moisture has evaporated completely. Always inspect the keyboard visually and test a few keys before resuming critical work to verify everything functions properly.
Conclusion
Learning how to clean keyboard properly without damage tip key remove transforms your approach to workspace maintenance and significantly extends your device’s functional lifespan. By following this comprehensive guide’s systematic methods—starting with compressed air, progressing to soft brushing, and using barely damp cloths as a final step—you’ll maintain pristine keyboard condition while protecting sensitive electronic components from preventable damage. Remember that consistency matters more than intensity; a brief weekly dusting prevents the need for risky intensive cleaning that damages your keyboard. Don’t overlook this essential maintenance task, as your keyboard deserves the same care you’d give any valuable technology investment. Start implementing these proven cleaning techniques today and enjoy a cleaner, more hygienic, and longer-lasting keyboard for years to come.
Recommended Products on Amazon
As an Amazon Associate I earn from qualifying purchases.