How to improve video call quality at home
The Complete Guide to Improve Video Call Quality Home Light Camera Tip Guide for Professional Success
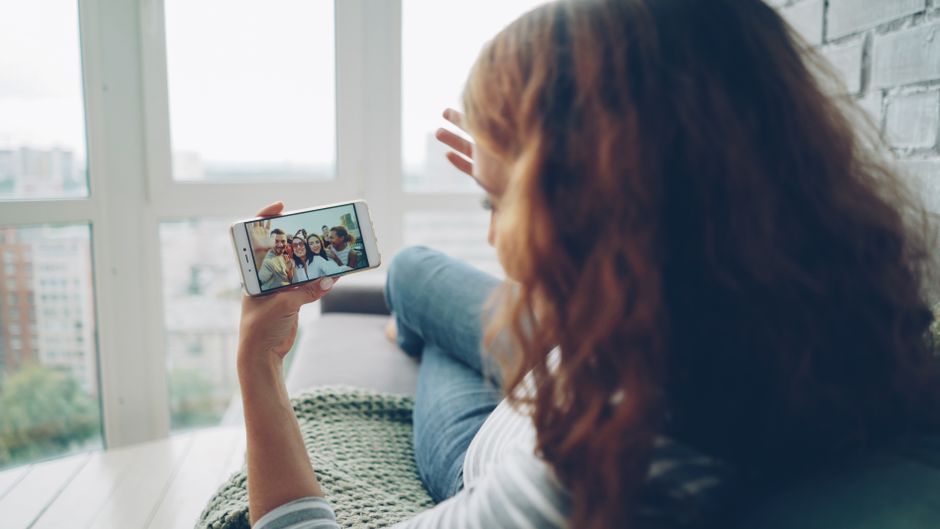
Whether you’re working from home, attending online classes, or connecting with loved ones, learning how to improve video call quality home light camera tip guide has become essential in our digital world. The difference between a pixelated, dark, unflattering video call and a crystal-clear, professional appearance often comes down to understanding a few key technical and environmental factors. This comprehensive guide will walk you through everything you need to know to transform your home video calling experience from mediocre to exceptional. We’ll cover lighting techniques, camera positioning, audio considerations, and hardware recommendations that will elevate your presence on every virtual meeting. By implementing these strategies, you’ll project confidence, professionalism, and clarity that will impress colleagues, clients, and friends alike.
Table of Contents
- Why Improve Video Call Quality Home Light Camera Tip Guide Matters
- Step-by-Step Improve Video Call Quality Home Light Camera Tip Guide
- Best Improve Video Call Quality Home Light Camera Tip Guide Options
- Pro Tips for Improve Video Call Quality Home Light Camera Tip Guide
- Common Mistakes to Avoid
- Key Takeaways
- Frequently Asked Questions about Improve Video Call Quality Home Light Camera Tip Guide
- Conclusion
Why Improve Video Call Quality Home Light Camera Tip Guide Matters
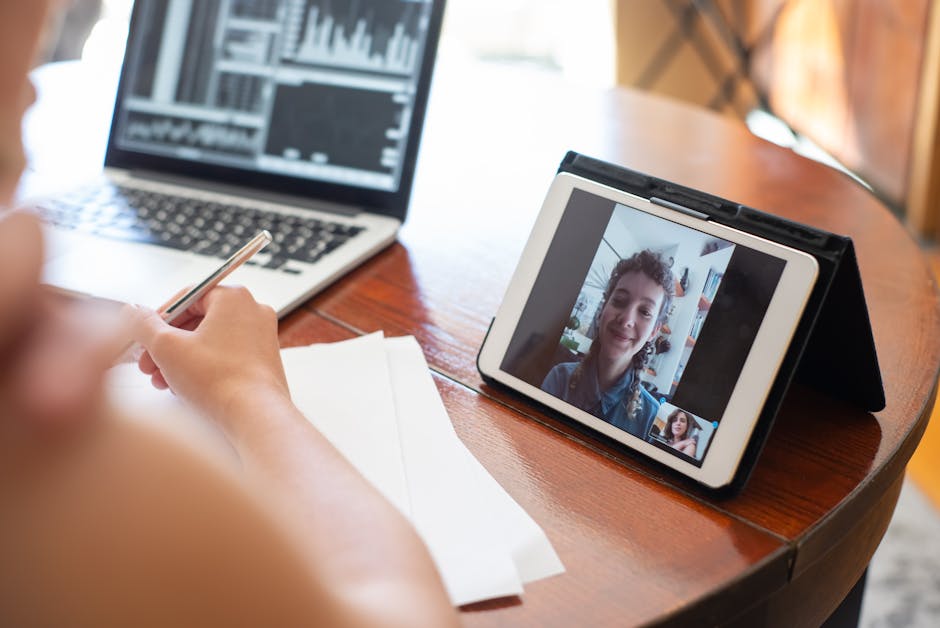
In today’s hybrid and remote work environment, your video presence is often your first impression. Studies show that people form judgments within the first few seconds of a video call, and poor lighting or camera quality can negatively impact how others perceive your professionalism and credibility. When your video feed is unclear, dim, or unflattering, it distracts from your message and can cause viewers to miss important information you’re trying to communicate.
The stakes are particularly high for job interviews, client presentations, and important business meetings where your visual appearance contributes significantly to the overall impression. A well-lit, properly framed video call demonstrates that you’ve taken time to prepare and respect the people you’re meeting with. This attention to detail extends beyond vanity—it’s about effective communication and ensuring your message lands with maximum impact.
Furthermore, improving video call quality home light camera tip guide can reduce eye strain for both you and your participants. Better lighting means your camera doesn’t have to compensate with excessive exposure, reducing the blue light and digital eye fatigue that comes from poorly lit video calls. When everyone on a call can see clearly without squinting, the entire meeting becomes more pleasant and productive, leading to better outcomes and stronger professional relationships.

Step-by-Step Improve Video Call Quality Home Light Camera Tip Guide
Assess Your Current Setup
Begin by taking a test video call or recording yourself to see exactly what your current setup looks like from your camera’s perspective. Open your video conferencing app and check how you appear before joining any important meetings—note the lighting, shadows, background, and overall clarity. Pay special attention to whether your face is well-lit, if there are unflattering shadows, and whether colors appear accurate or washed out.
Document any specific issues you notice: Is your image too dark? Are there harsh shadows under your eyes? Is your background distracting? Does your camera make you look pixelated or blurry? This assessment will help you prioritize which improvements to tackle first and measure progress as you implement changes.
Master Your Lighting Setup
Lighting is the single most important factor in improving video call quality home light camera tip guide, and fortunately, you can achieve professional results without expensive equipment. Position your main light source (whether natural window light or a lamp) in front of you rather than behind you—backlighting creates silhouettes and makes you appear as a dark blob on screen. Ideally, your key light should be at approximately a 45-degree angle from your camera, slightly above eye level.
If relying on window light, position yourself facing the window so natural light illuminates your face directly. Avoid sitting with the window directly behind you, as this creates strong backlighting that forces your camera to underexpose your face. On cloudy days or in the evening, supplement natural light with an affordable desk lamp or ring light positioned to the side of your camera.
Consider adding a secondary fill light on the opposite side of your camera to reduce harsh shadows on one side of your face. This doesn’t need to be a professional light—even a white poster board positioned to reflect your key light can effectively fill in shadows and create more flattering, dimensional lighting.
Optimize Your Camera Position
Your camera should be positioned at approximately eye level or slightly above to create the most flattering angle. Looking slightly up at the camera is more flattering than looking down, which can create unflattering shadows under your chin. Mount your camera on a small stand, stack of books, or adjustable arm rather than resting your laptop or phone flat on your desk.
Position your camera about 12-18 inches away from your face, ensuring that your head and shoulders fill the frame appropriately without being too close. When framing, imagine the rule of thirds—position your eyes in the upper third of the frame, leaving some space above your head but not so much that you appear to be looking down at the camera.
Clean your camera lens before every important video call, as dust and smudges significantly impact image quality. A simple microfiber cloth will remove fingerprints and dust that accumulate on your webcam throughout the week.
Improve Your Background
Your background should be clean, professional, and minimally distracting so that attention remains on you and your message. Remove clutter, personal items that might seem unprofessional, and anything that moves or catches light distractingly. A neutral wall, bookshelf with organized books, or professional background works well.
If your background isn’t ideal, consider using a virtual background feature available in most video conferencing platforms. However, professional webcams with high resolution make real backgrounds look better than virtual ones, so invest in improving your actual space first. You can also hang a simple backdrop behind yourself—even a bedsheet in a neutral color works effectively.
Ensure your background has some depth and isn’t perfectly flat, as this creates a more natural, three-dimensional appearance. Avoid sitting directly against a wall; position yourself a few feet away from the background so the camera can capture some depth and space.
Test Your Audio Quality
While this guide focuses on video, audio quality is equally important for overall call quality. Use your device’s built-in microphone for initial testing, but consider upgrading to an external microphone if you notice echo, background noise, or unclear sound. Position your microphone 4-6 inches from your mouth for optimal audio capture without being so close that you pick up breathing sounds.
Eliminate background noise by closing windows, turning off fans, and muting notifications on your phone and computer before calls. If you have a noisy environment, invest in a quality microphone with noise cancellation features. Test your audio settings in your video conferencing app before important meetings to catch any issues.
Choose the Right Camera
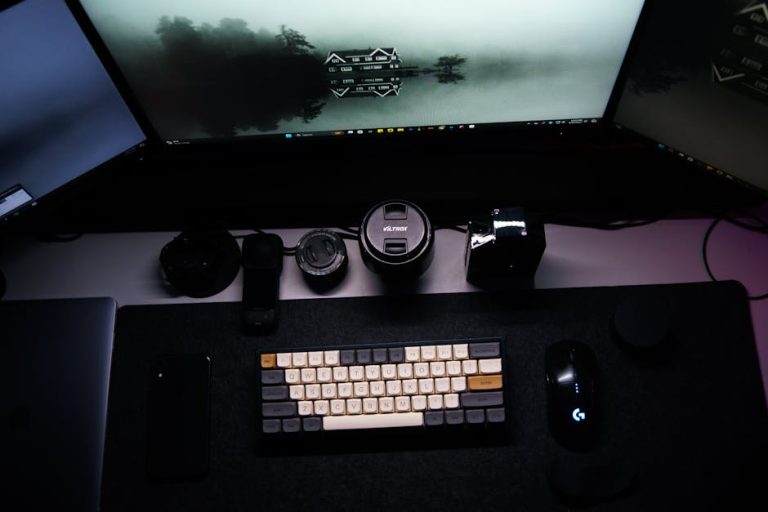
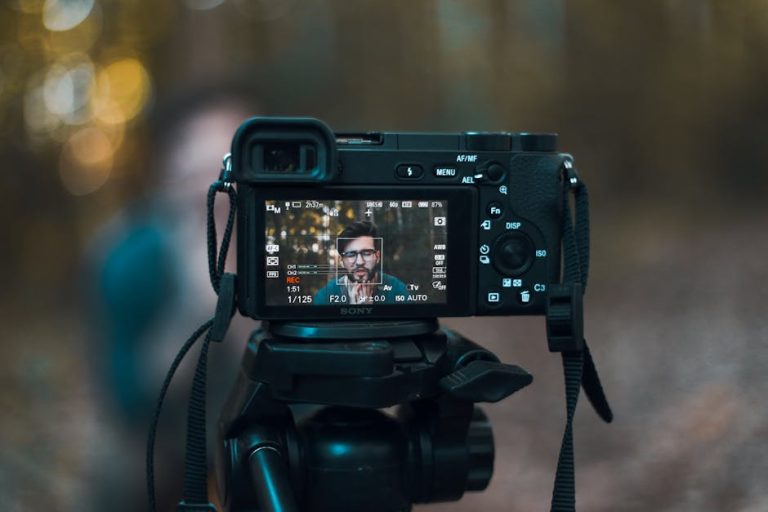
If using your laptop’s built-in camera, ensure you’re using the latest video conferencing software that optimizes camera performance. For better quality, consider upgrading to an external webcam with higher resolution—many professional-grade webcams now cost less than $100 and dramatically improve video quality.
Look for cameras that offer at least 1080p resolution, a wide field of view, and good low-light performance. Some advanced webcams include autofocus and built-in microphones, though external microphones typically sound better. Popular options range from budget-friendly choices to premium models depending on your needs and usage frequency.
Adjust Your Video Settings
Access your video conferencing app’s camera settings and adjust brightness, contrast, and saturation to match your specific lighting conditions. Most apps have a preview feature that lets you see these adjustments in real-time before applying them. Start with automatic settings and then fine-tune manually if needed.
Enable hardware acceleration if available, which uses your computer’s GPU to improve video processing and reduce latency. Check your bandwidth settings and ensure your internet connection is stable before important calls—a wired ethernet connection is more reliable than Wi-Fi for video conferencing.

Best Improve Video Call Quality Home Light Camera Tip Guide Options
Lighting Solutions
The most cost-effective lighting upgrade is a simple LED desk lamp with adjustable color temperature, allowing you to match the lamp’s warmth to your environment. Ring lights have become increasingly popular for video calls and streaming, offering even, shadow-free illumination with adjustable brightness. These typically cost between $20-80 and can significantly improve video quality.
For those seeking professional-quality lighting, panel lights offer studio-grade results with precise color temperature control and the ability to adjust intensity. Softbox lighting kits provide diffused, flattering light that minimizes harsh shadows. While these options are more expensive ($100-300), they’re worthwhile investments if you have frequent video calls.
Camera Options
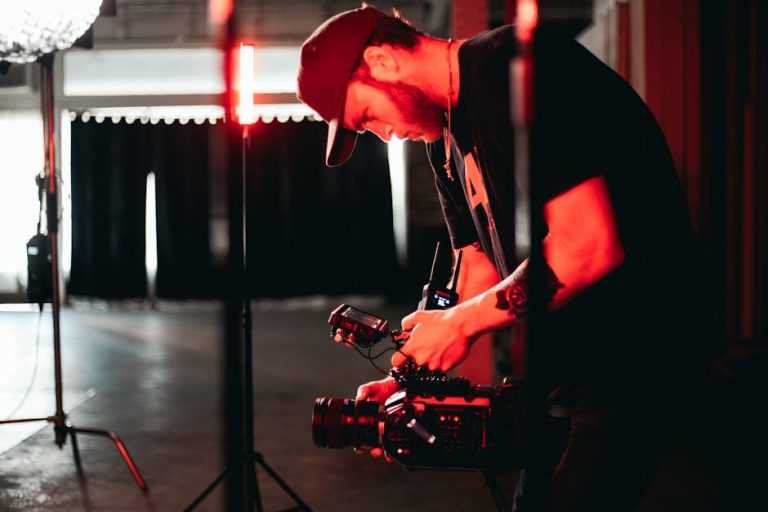
External webcams designed specifically for video conferencing offer superior image quality compared to built-in laptop cameras. The Logitech C920 remains an industry standard, offering excellent value with 1080p resolution and reliable performance across different platforms. For premium options, cameras like the Razer Kiyo offer enhanced low-light performance and higher frame rates.
If you’re serious about video quality and have the budget, professional mirrorless cameras can be used as webcams with the right software and hardware setup. This approach offers cinema-quality video but requires more technical knowledge and investment. For most users, a mid-range external webcam between $50-150 provides the best balance of quality and affordability.
Microphone Upgrades
USB microphones like the Blue Yeti offer excellent sound quality and are easy to set up without additional hardware. Condenser microphones capture more detail and nuance in your voice compared to built-in laptop microphones. If your current setup picks up background noise, a quality USB microphone with noise cancellation will dramatically improve call quality.
Lavalier microphones offer a convenient hands-free option if you move around during calls, though they require more technical setup. For most home office scenarios, a desktop USB microphone positioned appropriately provides the best audio quality without requiring extensive configuration.

Pro Tips for Improve Video Call Quality Home Light Camera Tip Guide
Use Dual Lighting for Professional Results
Implement a three-point lighting setup when possible: a key light (your main light source), a fill light (to reduce shadows), and a backlight (to separate you from your background). This professional technique requires minimal investment—even improvised light sources work effectively when positioned correctly. The key light should be bright, the fill light should be about half the brightness of the key light, and the backlight should create subtle rim lighting around your head and shoulders.
Optimize Your Sitting Position
Sit up straight and maintain good posture, which not only looks more professional but also projects confidence. Position yourself slightly off-center in the frame rather than dead center, which creates a more dynamic, visually interesting composition. Maintain consistent distance from the camera throughout your call by using a desk setup that remains stable.
Create a Professional Background
Invest in a few simple background elements that enhance your professional image without being distracting. A bookshelf with organized books, artwork, or plants adds visual interest and demonstrates thoughtfulness. Avoid backgrounds that reveal personal or potentially unprofessional items—remember that your background should support your message, not distract from it.
Manage Lighting Throughout the Day
Different times of day provide different natural lighting conditions. If you have frequent video calls, test your setup at various times to understand how light changes affect your appearance. Adjust your artificial lighting to maintain consistency, especially if you have calls at different times. Investing in dimmable lights gives you flexibility to adapt to changing conditions.
Test Everything Before Important Calls
Create a pre-call checklist: test your camera, microphone, lighting, and background 5-10 minutes before every important call. Join the call a few minutes early and verify everything appears and sounds correct. This simple habit prevents embarrassing technical issues and gives you confidence as you begin your call.
Common Mistakes to Avoid
Backlighting Your Face
One of the most common mistakes is positioning yourself with a window or bright light source directly behind you. This forces your camera to expose for the background, leaving your face dark and underexposed. Always position light sources in front of you, not behind you, to properly illuminate your face and eyes.
Using Fluorescent Overhead Lighting Alone
While convenient, overhead fluorescent lights create unflattering shadows and often cast a sickly greenish tone. These lights, when positioned above your head, create shadows under your eyes and cheekbones that make you look tired. Always supplement overhead lighting with front-facing key light to create flattering, dimensional illumination.
Positioning Your Camera Below Eye Level
Looking down at your camera creates unflattering angles that emphasize your chin and neck while creating shadows under your cheekbones. Even a small adjustment to position your camera at or slightly above eye level dramatically improves your appearance on video calls.
Neglecting Audio Quality
Many people focus exclusively on video while ignoring audio—a critical mistake since viewers will forgive mediocre video but not poor audio. Invest in at least a basic external microphone and position it appropriately to ensure your voice comes through clearly.
Using Extreme Virtual Backgrounds
While virtual backgrounds are convenient, they often look fake and can distract viewers, especially if your lighting isn’t ideal. Real backgrounds processed through good cameras look far more professional than virtual alternatives. Only resort to virtual backgrounds when your actual background is genuinely problematic.
Ignoring Bandwidth and Connection Quality
Even with perfect lighting and equipment, a poor internet connection ruins video calls. Ensure your Wi-Fi signal is strong or use a wired ethernet connection when possible. Close bandwidth-heavy applications before calls and ask others in your household to limit internet usage during important meetings.
Positioning Camera Too Close or Far Away
The camera distance dramatically affects how you appear on screen. Too close creates an unflattering wide-angle distortion, while too far makes you appear small and distant. Aim for 12-18 inches from your face, adjusting based on your camera’s field of view and the framing you want to achieve.

Key Takeaways
- Lighting is paramount: Position front-facing light sources at 45-degree angles above eye level to create flattering, professional illumination without harsh shadows
- Camera positioning matters: Keep your camera at or slightly above eye level, approximately 12-18 inches away, with your eyes in the upper third of the frame
- Invest in quality equipment: An external webcam and USB microphone are the most impactful upgrades for most home offices, each costing under $100
- Create a professional background: Use organized real backgrounds or subtle virtual ones to ensure attention remains on you and your message
- Test before important calls: Always verify your camera, microphone, lighting, and background 5-10 minutes before every significant video meeting
Frequently Asked Questions about Improve Video Call Quality Home Light Camera Tip Guide
Q: What is the best improve video call quality home light camera tip guide setup for beginners?
A: Start with a ring light positioned in front of you, an external webcam at eye level, and a clean, neutral background. These three elements create a dramatic improvement for minimal investment. Test your setup with a practice call and adjust based on what you observe—this foundation covers the essentials without overwhelming you with options.
Q: How do I use improve video call quality home light camera tip guide if I have limited space?
A: Position a compact ring light on your desk, mount your webcam on a small stand or stack of books, and use a simple backdrop or blank wall as your background. Even in small spaces, strategic positioning of these elements creates professional results. Vertical arrangements maximize limited desk space while maintaining ideal lighting angles.
Q: Can I achieve professional video quality without expensive equipment?
A: Absolutely—quality lighting is more important than expensive cameras. A $30 LED lamp positioned correctly outperforms a $500 camera with poor lighting. Start with basic improvements to lighting and positioning, then upgrade equipment gradually as your needs evolve.
Q: What’s the ideal distance between my face and the camera?
A: Position your camera 12-18 inches away, adjusting based on your camera’s field of view and your preferred framing. Your head and shoulders should fill most of the frame without being uncomfortably close, creating a professional, engaging appearance.
Q: How can I improve video quality if I’m stuck with my laptop’s built-in camera?
A: Focus on perfect lighting and positioning—these matter far more than the camera itself. Add a ring light or desk lamp, position it correctly, clean your camera lens, and adjust your video settings in your conferencing app. These improvements work dramatically better than upgrading the camera.
Conclusion
Mastering how to improve video call quality home light camera tip guide is an investment in your professional presence that pays dividends in every virtual meeting. By implementing the lighting techniques, camera positioning strategies, and equipment recommendations in this guide, you’ll transform your video appearance from average to impressive. Start with the most impactful changes—proper lighting and camera positioning—then gradually add equipment upgrades as your needs and budget allow. Remember that consistency matters: apply these principles to every call, not just important ones, until professional video presence becomes your default. Your colleagues, clients, and friends will notice the dramatic difference, and you’ll feel more confident and professional during every video interaction.
Recommended Products on Amazon
As an Amazon Associate I earn from qualifying purchases.