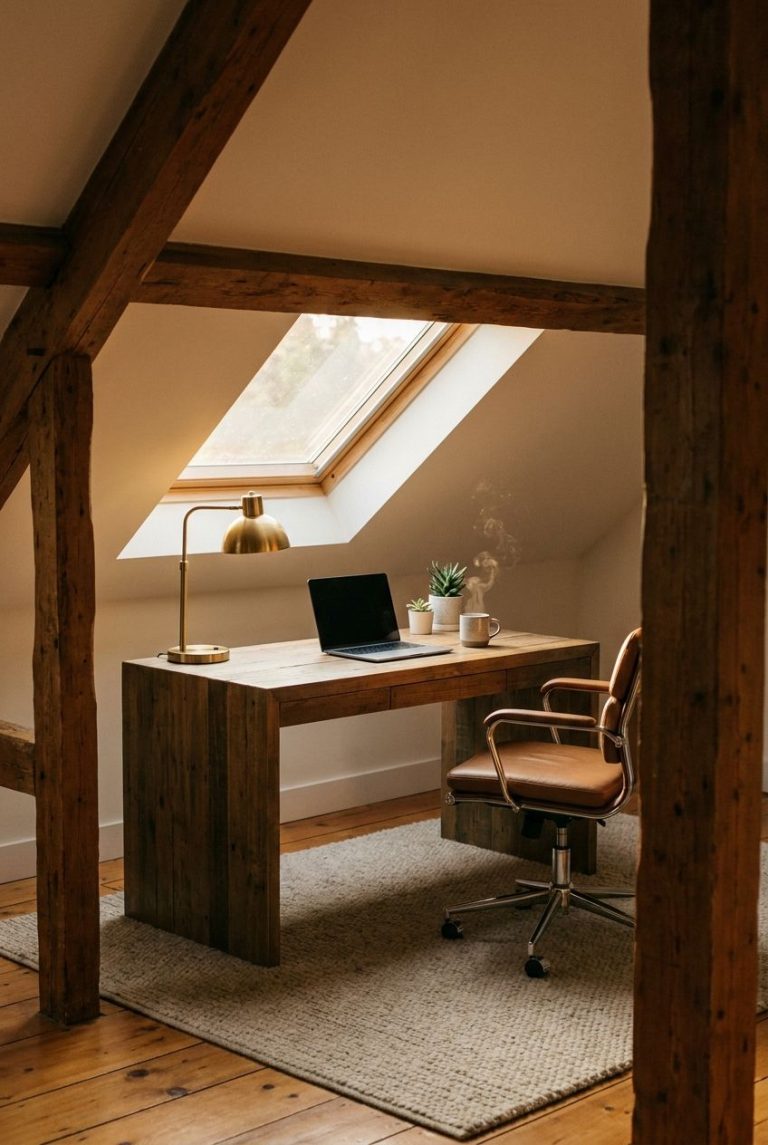
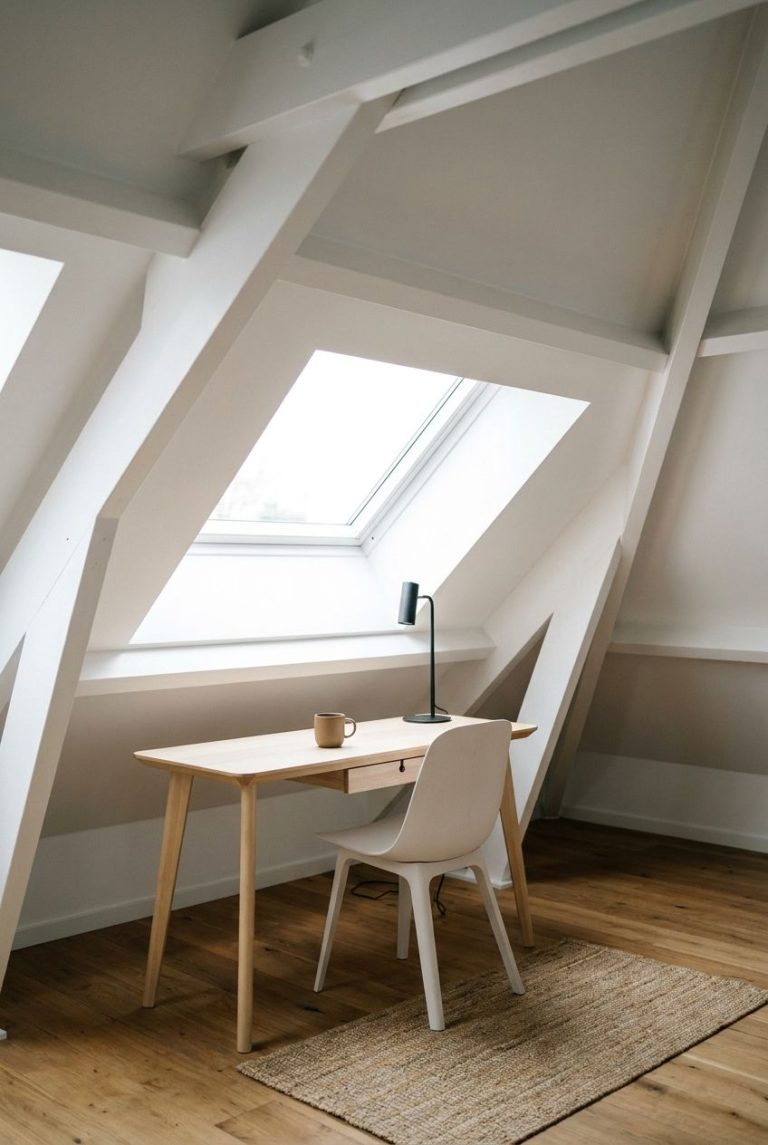
Office In The Attic: How to Build a Home Workspace for Under $6,000 (And Avoid the $4,000 Mistakes)
Most people who convert an attic into an office spend their first $2,000 on the wrong things: a gorgeous desk, designer lighting, a standing-desk motor. Then July arrives, the room hits 104°F, and the laptop throttles itself to a crawl. An office in the attic can be the best workspace in your home, quiet, private, and a floor above the household noise, but only if you solve heat, access, and headroom before you buy a single piece of furniture.
This guide walks through the full process in the order that saves money: checking whether your attic qualifies, budgeting realistically, insulating, climate control, lighting, layout, and finishing. You’ll get exact numbers, product names, and the mistakes that quietly wreck most attic conversions.
Can Your Attic Actually Become an Office? The 5-Minute Qualification Check
Before pricing anything, spend five minutes with a tape measure. Most attics fail on one of three tests, and it is far cheaper to discover that now than after you’ve bought drywall.

The Headroom Rule
The International Residential Code (IRC), the model building code most US jurisdictions adopt, generally requires a ceiling height of at least 7 feet over at least 50% of a habitable room’s floor area. Sloped ceilings are allowed to drop to 5 feet at the edges. Measure from the finished floor (or the joists, if you’re adding a floor) to the underside of the rafters at the ridge, the peak where two roof slopes meet.
If your peak is under 7 feet, you can still use the space informally as a hobby room or storage, but it won’t legally count as an office or add to your home’s square footage.
The Floor Strength Test
Attic floor joists, the horizontal beams under your feet, are often sized only to carry the ceiling below, around 10 pounds per square foot (psf). Habitable rooms need to support 30 to 40 psf. If your joists are 2x6s spaced 16 inches apart, you will likely need to “sister” them, meaning bolt a new 2×8 or 2×10 alongside each one. Budget $8 to $15 per linear foot of joist for lumber and labor.
The Access Test
A pull-down ladder won’t pass code for a habitable room. You need a permanent staircase at least 36 inches wide with 6 feet 8 inches of headroom. If you can’t find 10 square feet of floor space below to land a staircase, the project may be dead on arrival.
- Measure peak height: 7 feet or more is the target.
- Check joist size and spacing: look for stamped lumber grades on the wood.
- Locate stair space: roughly 3 feet by 10 feet of clear run.
- Call your local building department: ask what permit a home office conversion requires. Most charge $150 to $600.
But what if my attic fails the headroom test? A dormer, a framed-out projection that adds vertical wall space, can rescue a low roof, but costs $15,000 to $40,000. For most people that’s the point to choose a different room.
What an Office in the Attic Really Costs: A Realistic 2024 Budget
Contractors quote attic conversions at $50 to $150 per square foot for full bedrooms with bathrooms. A home office is far simpler, with no plumbing and fewer electrical demands, so a DIY-heavy approach lands between $2,500 and $9,000 for a typical 200-square-foot attic.
Here is how a mid-range $5,800 budget breaks down:
- Joist reinforcement and subfloor: $900 (2×10 sistering plus 3/4-inch tongue-and-groove plywood at about $55 per sheet).
- Insulation: $1,100 for closed-cell spray foam on the rafters or rigid foam plus batts.
- Drywall and paint: $850 for materials, finishing, and two coats of low-VOC paint.
- Electrical: $700 for two new 20-amp circuits, six outlets, and a subpanel tap if needed.
- Mini-split heat pump: $1,500 for a 9,000 BTU unit installed.
- Lighting and window upgrades: $450 including one Velux skylight at about $350 (before installation).
- Permit: $300 average.
Staircase work is the wildcard. A prefabricated attic stair kit runs $400 to $900, while a custom-built staircase from a carpenter costs $2,500 to $6,000.
Where to Spend and Where to Save
Spend on insulation, climate control, and electrical, because those can’t be easily redone behind finished walls. Save on furniture, trim, and decor, which you can upgrade at any time. A $200 desk in a comfortable room beats a $2,000 desk in an oven.
Budget a 15% contingency, about $870 on this plan. Old houses hide knob-and-tube wiring, undersized rafters, and wasp nests behind the soffits.
How to Insulate an Attic Office So It Stays Within 5 Degrees of the Rest of Your House
Insulation is the single biggest factor separating a comfortable attic office from an unusable one. Heat rises, and your roof sits in direct sun, so an uninsulated attic can hit 130°F on a 90°F day. A well-insulated one holds near 75°F.

R-value measures resistance to heat flow, and higher is better. The Department of Energy recommends R-49 to R-60 for attic floors in cold climates, but for a conditioned attic space you insulate the roof slope instead, usually targeting R-30 to R-38 in the rafters and R-13 to R-21 in knee walls (the short vertical walls where the roof slope meets the floor).
Step-by-Step: Insulating the Rafters
- Check roof ventilation first. Install foam or plastic baffles (about $2 each) in every rafter bay so soffit air can flow up to the ridge vent. Success looks like a visible 1-inch air channel above where insulation will sit.
- Choose your material. Closed-cell spray foam delivers R-6.5 per inch and seals air leaks, but costs $1.50 to $3.00 per board foot. Rigid foam board (Owens Corning Foamular, R-5 per inch) plus fiberglass batts is cheaper at $0.80 to $1.50 per square foot for materials.
- Seal gaps with canned spray foam. Use Great Stuff on any crack wider than 1/4 inch around pipes, wires, and chimneys.
- Install and cover. Add a vapor barrier if your climate demands it, then drywall over everything.
But what if I can’t afford spray foam? Rigid foam plus batts reaches nearly the same R-value for 40% less, though you’ll spend an extra weekend cutting and fitting it.
But what if my attic has no ridge vent? Add one before insulating. Without it, moisture can condense on the underside of the roof deck and rot it within 3 to 5 years.
Heating and Cooling Your Attic Office: Why a Mini-Split Beats Everything Else
Extending your existing ductwork into an attic is usually a mistake. Your central HVAC was sized for the original square footage, so adding 200 square feet shortchanges every room, and the attic at the far end of the duct run gets weak airflow.
A ductless mini-split, a heat pump with an outdoor compressor and a wall-mounted indoor head, solves this. A 9,000 BTU unit cools and heats about 350 square feet, plenty for an attic office.
| Option | Upfront Cost | Operating Cost (Monthly) | Best For |
|---|---|---|---|
| Ductless mini-split (Mitsubishi, Fujitsu, MRCOOL) | $1,500 to $3,500 installed | $15 to $40 | Year-round use in any climate, quiet operation (about 25 dB indoors) |
| Window AC unit plus electric heater | $350 to $700 | $40 to $120 | Tight budgets or seasonal use only |
| Extended central ductwork | $1,200 to $4,000 | $20 to $60 | Homes where the HVAC has spare capacity (rare) |
Recommendation: Choose the mini-split for any office you’ll use daily. Choose the window unit only if you work from the attic fewer than 20 hours per week or rent your home. Skip the ductwork extension unless an HVAC technician confirms your system has at least 15% spare capacity.
Sizing Without Guesswork
Use 25 BTU per square foot as a baseline for an insulated attic, then add 1,000 BTU if the room has a large west-facing window or two people will work in it. An oversized unit short-cycles, meaning it shuts off before dehumidifying, leaving the room clammy.
Ask your installer for a model with an Energy Star rating and a SEER2 of 20 or higher. That efficiency difference can save $150 a year versus a bargain unit.
Lighting an Attic Office: How to Get 50 Foot-Candles in a Room With Slanted Walls
Attics are notoriously dark. Slanted ceilings absorb light, and dormer windows face one direction. The Illuminating Engineering Society recommends 30 to 50 foot-candles (a measure of light intensity) for computer work, about 300 to 500 lux.

Layer Three Types of Light
- Ambient: Recessed 4-inch LED fixtures (Halo or Lithonia, $15 to $25 each) rated 2700K to 3500K, spaced 4 feet apart on the flat portion of the ceiling.
- Task: A desk lamp like the BenQ ScreenBar ($109) that illuminates the keyboard without reflecting on the monitor.
- Natural: A skylight or roof window delivers about three times the light of a vertical window of the same size. A Velux FS (fixed) 21 by 38 inches costs $250 to $400.
Note that recessed cans in a sloped ceiling need “sloped ceiling” or adjustable gimbal trims, around $6 more each, or the light will point at the wall instead of the floor.
Position your desk perpendicular to the main window. Facing it creates screen glare, and facing away puts your own shadow on the keyboard. Success looks like a monitor you can read at 3 p.m. without closing the blinds.
But what if my attic has no windows at all? A sun tunnel (Solatube, about $600 installed) pipes daylight through a reflective tube and works even in tight attics.
The Best Layouts for an Attic Office With Sloped Ceilings
Sloped ceilings waste floor space unless you plan around them. The usable zone is the part with at least 5 feet of height. Everything shorter than that becomes storage, not a work area.
Three Layouts That Work
- Desk under the ridge: Place your desk and chair where headroom is 6.5 feet or more, and put the low edges to use for built-in drawers or bookshelves. This suits single-desk setups in 150 to 250 square feet.
- Gable window focus: Put the desk in front of the gable-end window, with shelves along the knee walls. This maximizes natural light and works well for video-call backdrops.
- Two-zone split: Use the high center for a standing desk and the low sides for a reading nook or a filing wall. This is ideal in attics 12 feet wide or more.
Custom knee-wall cabinetry runs $600 to $1,800, but IKEA’s Besta or Ivar systems, cut down to fit, deliver 80% of the function for about $300.
Put your standing desk against a vertical wall, never under the slope. A Uplift V2 or FlexiSpot E7 raises to 48 inches, and you need at least 5 feet of clearance above the tabletop for monitors and your own head.
But what if the stairs open into the middle of the room? Rotate the layout 90 degrees and use the stair rail as a visual divider. A bookcase with an open back along the rail adds privacy without blocking light.
Wiring, Internet, and Power: The Infrastructure Most People Forget
An office with weak Wi-Fi and three outlets is a frustrating office. Plan the infrastructure before the drywall goes up, because retrofitting afterward costs three times as much.

Run a dedicated 20-amp circuit for your desk equipment, separate from lighting. A computer, two monitors, a space heater, and a printer can trip a shared 15-amp breaker (limit: 1,800 watts) faster than you’d expect. An electrician charges $300 to $800 to add a circuit from your panel.
For internet, run a Cat6 ethernet cable from your router to the attic before closing walls. Cat6 supports 1 Gbps speeds up to 328 feet and costs about $0.25 per foot. Wi-Fi often loses half its speed passing through two floors; a wired connection avoids that entirely.
Your Wiring Checklist
- Outlets: One every 6 feet along walls, plus a floor outlet near the desk if it sits mid-room.
- USB-C outlets: Leviton and Legrand make 30-watt USB-C wall plates for $25 to $40.
- Smoke and CO detectors: Code requires a hardwired, interconnected smoke alarm in any habitable attic.
- Surge protection: A whole-office power strip like the Tripp Lite ISOBAR6 ($45) protects roughly $3,000 of gear.
But what if my home’s electrical panel is full? A subpanel adds 4 to 12 breaker slots for $600 to $1,200 installed, and is often cheaper than upgrading the whole panel.
Soundproofing and Privacy: Keeping the Attic Quiet Without Spending $3,000
Attics have a surprising advantage: nobody walks above you. But sound still travels down through the floor, and rain on a metal or asphalt roof can be loud overhead.
Sound is measured in STC (Sound Transmission Class), where higher numbers block more noise. A standard attic floor scores around STC 30 to 35, meaning normal speech is clearly audible below. You want to reach STC 50, where loud speech is barely audible.
- Add mass to the floor. Lay a layer of 5/8-inch Type X drywall under the subfloor, or use Green Glue compound between two plywood layers (about $16 per tube, two tubes per sheet).
- Fill joist bays. Mineral wool like Rockwool Safe’n’Sound, R-15, absorbs sound better than fiberglass. A 200-square-foot floor needs about $350 of material.
- Decouple the ceiling below. Resilient channels (metal strips, $3 each) separate the drywall from the joists, cutting vibration transfer by up to 10 STC points.
- Finish with rugs. A 8-by-10 wool rug with felt pad ($300 to $600) absorbs echo and footsteps.
For rain noise, closed-cell spray foam dampens roof sound better than any other insulation, which is one more reason to consider it.
But what if my kids or roommates are loud directly below? Add a solid-core door at the bottom of the stairs ($180) and weatherstripping around its edges. A closed door cuts noise by about 25 decibels, the difference between a TV and a whisper.
Five Mistakes That Wreck Attic Offices (and How to Avoid Each One)
These mistakes show up in nearly every failed attic conversion.
- Skipping the permit. Unpermitted conversions can force you to tear out finished work during a home sale, and insurers may deny claims on unpermitted space. A $300 permit prevents a $15,000 headache. Call your building department before you swing a hammer.
- Blocking the ventilation channels. Pressing batt insulation hard against the roof deck smothers the airflow and traps moisture, which can cause mold within one humid season. Always install baffles first.
- Under-sizing the cooling. A $300 portable AC rated 8,000 BTU often delivers only 5,000 BTU real-world cooling (the newer DOE rating reveals this). In a 100°F attic, it will lose. Size for the worst day of summer, not the average one.
- Ignoring fire egress. If your office is a legal habitable room, building code may require a second exit or an egress window at least 5.7 square feet in opening area. Plan one early, since cutting a window into a finished roof costs $1,500 or more.
- Forgetting delivery logistics. A 60-inch desk won’t turn a tight 90-degree staircase. Measure your stairs, then buy furniture that ships flat-packed or in pieces under 30 inches wide.
Avoid all five and you’ll sidestep roughly $4,000 in average rework costs.
Objections and What-Ifs: Is an Attic Office Worth It for Your Situation?
Reasonable people hesitate before turning a storage space into a workspace. These are the five most common objections.
“I rent my home.”
Don’t touch the structure. Instead, set up a lightweight version: a window AC unit, a $150 rug, LED floor lamps, and a temporary desk. Total cost under $900, fully portable when you move.
“I’m worried about heat in summer.”
Heat is solvable, not inevitable. Rafter insulation at R-30 plus a mini-split keeps even Phoenix attics under 78°F. In mild climates like Seattle or Portland, a good fan and insulation can be enough.
“Will it add value to my home?”
Permitted attic conversions return 50% to 70% of cost at resale, according to Remodeling Magazine’s Cost vs. Value reports, and they add legal square footage that raises appraisals. Unpermitted space usually adds nothing.
“What about the stairs, I have bad knees.”
Consider a stair-friendly design with shallower rise (7 inches or less per step) and handrails on both sides. Or choose a different room; a basement or spare bedroom may serve you better.
“I only work from home 2 days a week.”
Then a 3,000 to 4,000 dollar commitment may not pay off. Rent a coworking desk for $200 to $350 a month first, and track whether you actually miss having a dedicated space.
Your First Weekend: The Exact Next Steps
Don’t spend a dollar on furniture this weekend. Spend it gathering the information that decides whether this project works.
On Saturday morning, bring a tape measure, a flashlight, and a notepad up to the attic. Record peak height, floor joist size and spacing, the width of the floor area with 5 feet of headroom, and any signs of roof leaks, such as dark stains on the underside of the roof deck. Photograph every wall, window, and the stair access point.
On Monday, call your local building department and ask three questions: whether a home office conversion needs a permit, what the minimum ceiling height and egress requirements are, and whether a licensed contractor is required for electrical work in your jurisdiction. Then request quotes from two electricians and one insulation contractor using your measurements.
With those three quotes and your permit answer in hand, you’ll know within a week whether your office in the attic is a $3,000 weekend project or a $10,000 renovation, and you’ll make that call with real numbers instead of hope.